macOS workflow
This page presents a use case for using Codemagic to export a Godot project for macOS. We will not cover writing rules, the composition, or the operation of a codemagic.yaml file.
- You can skip the tutorial and grab the yaml files in Overview
- To learn how
codemagic.yamlfiles work, see Creating codemagic.yaml. - To better understand what we'll do here, take a look at Workflow Configuration if its not already done.
- To learn how to configure your Godot project and repository, see Process Overview.

Image by Codemagic, used under CC BY-ND 4.0 license. See gallery
Requirements
- A text editor
- Workflow Configuration file. (See Workflow Configuration)
As explained in Project Configuration, you should configure your project for export as if you were exporting it on your local machine.
- Learn more about how to export a Godot project to Android with Exporting for macOS.
Configuration
We need to create a new workflow in which we will define its own specific variables. Add the following code to your codemagic.yaml file, right after the definitions section:
workflows:
  godot-macos-workflow:
    name: MacOS Export
    max_build_duration: 120
    instance_type: mac_mini_m2
    working_directory: /Users/builder/Downloads

    environment:
      vars:
        <<: *godot_variables
        OUTPUT_FILE: test.zip
        EXPORT_PRESET: macOS
Make sure your file now looks like this:
definitions: ...

workflows:
  godot-macos-workflow: ...
Do you remember the Workflow Configuration file ?
We use the << and * operators to reuses its sections.
- Learn more about reusable sections in a
codemagic.yamlfile with Reusing sections - For more details on the reused variables, see Minimal Configuration
Here a description of variables we defined:
| Variable | Description |
|---|---|
| OUTPUT_FILE | The name of the exported file. Format: <PROJECT_NAME>.<EXTENSION>. The output file extension should match the one used by the Godot export process. See Exporting from the command line |
| EXPORT_PRESET | The name of the export preset that will be used to export your project. |
- To learn more about environment variables in a
codemagic.yamlfile see Configuring Environment Variables
Now we need to configure the export process. Add the following code to your godot-macos-workflow section:
scripts:
  - *install_godot
  - *install_godot_export_templates
  - *export_project
  - *gather_files

artifacts:
  - *zipped_export
Then make sure your workflow now looks like this:
workflows:
  godot-macos-desktop-workflow:
    ...
    environment: ...
    scripts: ...
    artifacts: ...
And that's it, all that's left is to configure your credentials to export your project. If you don't plan to sign your exported project, you can simply start the build. Your project will be available for download in .zip format once the process is complete. To start a new build, you can use Codemagic's interface, or events affecting your repository such as push.
- See Build Automatically to automate the execution of your Codemagic configuration.
- See also Build Notifications to get a notification informing you of the result of your build.
Configure rcodesign
Part 1
To use rcodesign on the build machine, make sure to enable rcodesign in Godot with your local machine.
You don't need to fullfill the required informations because they won't be saved in your export_presets.cfg file. Instead, these informations will be saved to export_credentials which should never be commited for security reasons.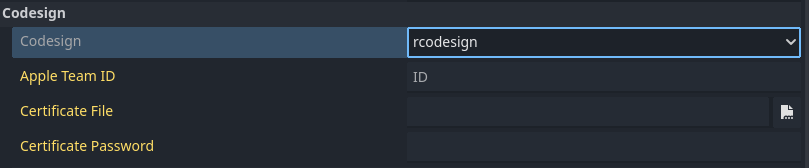
- Learn more about rcodesign in Godot with Signing Options
The following variable groups and variables will be used to retrieve codesign informations that Godot does not store in the export_presets.cfg file.
- To learn more about some of these variables, see Godot macOS Environment variables and EditorExportPlatformMacOS
| Variable name | Variable value | Group |
|---|---|---|
| CERTIFICATE_FILE_NAME | The name of your certificate with the extension. | apple_credentials |
| GODOT_MACOS_CODESIGN_CERTIFICATE_FILE | Your certificate - base64 encoded. | apple_credentials |
| GODOT_MACOS_CODESIGN_CERTIFICATE_PASSWORD | Password for the certificate file. | apple_credentials |
| PROVISIONING_PROFILE_NAME | The name of your certificate with the extension. | apple_credentials |
| GODOT_MACOS_CODESIGN_PROVISIONING_PROFILE | Provisioning profile file - base64 encoded. | apple_credentials |
Add these variables in the Codemagic interface (either as Application or as Team variables), make sure to click Secure to make sensitive data encrypted.
- Learn how to store these variables using the Codemagic interface by watching this video:
- To learn more about environment variables in a
codemagic.yamlfile see Configuring Environment Variables - To learn more about storing binary files with Codemagic, see Storing Binary files
- If you don't own a PC, you can use a website like base64.guru or base64encode to encode your
keystorefile to base64.
To use the defined variables in our workflow, we have to add their group(apple_credentials) to our configuration file(codemagic.yaml file). To do so, add the following code to the environment section of godot-macos-workflow:
groups:
  - apple_credentials
Then make sure your workflow now looks like this:
godot-macos-workflow:
  ...
  environment:
    groups:
      - apple_credentials
    ...
TIP
If you already have a groups section in your script, simply add the - apple_credentials line to it.
We now need to configure our variables so that Godot can find and use them. We'll create a new script before the export script (*export_project). Add the following lines to the scripts section of godot-macos-workflow:
- name: Export Configuration
  script: |
    export CREDENTIAL_PATH=/tmp/$CERTIFICATE_FILE_NAME
    echo $GODOT_MACOS_CODESIGN_CERTIFICATE_FILE | base64 --decode > $CREDENTIAL_PATH
    echo "GODOT_MACOS_CODESIGN_CERTIFICATE_FILE=$CREDENTIAL_PATH" >> $CM_ENV

    export CREDENTIAL_PATH=/tmp/$PROVISIONING_PROFILE_NAME
    echo $GODOT_MACOS_CODESIGN_PROVISIONING_PROFILE | base64 --decode > $CREDENTIAL_PATH
    echo "GODOT_MACOS_CODESIGN_PROVISIONING_PROFILE=$CREDENTIAL_PATH" >> $CM_ENV
Then, make sure your scripts section now looks like this:
scripts:
  ...
  - *install_godot_export_templates ...
  - name: Export Configuration ...
  - *export_project ...
What have we done?
For your provisioning profile and certificate file:
- First, we define a variable (
CREDENTIAL_PATH) to specify the path where your encoded file will be stored on the build machine. Then, we decode your encoded file and save it to that location. - Next, we update the variable holding the encoded file to point to the decoded file's path, since Godot expects a file path rather than raw encoded data.
- Finally, we register the variable now holding the decoded file path as global environment variables on the build machine, so Godot can access and use it during the build.
Part 2
Now we need to install rcodesign on the build machine. To speed up the process, we'll use a prebuild binary.
- rcodesign binaries can be found on the GitHub Releases page.
- If your build machine is not a MacOS, check out PyOxidizer instead.
Inside your Export Configuration section, add the following code:
export FILE=apple-codesign-0.29.0-macos-universal.tar.gz
export RCODESIGN_URL=https://github.com/indygreg/apple-platform-rs/releases/download/apple-codesign%2F0.29.0/$FILE
curl -L "$RCODESIGN_URL" -o "$FILE" && unzip "$FILE"
rm $FILE
export RCODESIGN_PATH=$(pwd)/$FILE
export SETTINGS_VERSION=$(echo "$GODOT_VERSION" | awk -F'[.-]' '{
    if ($1 == 3) print "3";
    else if ($2 == 0) print $1;
    else print $1"."$2
}')
export GODOT_SETTINGS=${EDITOR_DATA_DIR}/editor_settings-${SETTINGS_VERSION}.tres
cat <<EOF > "$GODOT_SETTINGS"
[gd_resource type="EditorSettings"]

[resource]
export/macos/rcodesign = "$RCODESIGN_PATH"
EOF
This script downloads the rcodesign binary and install it on the build machine, then stores the binary path in a variable. At last, the script register the binary path in the Godot settings by creating the settings file where Godot expect it to be.
To create the Godot settings file, we extract the correct file version (4.<MINOR>.tres for Godot 4 or 3.tres for Godot 3) by processing the GODOT_VERSION variable using text manipulation tools like awk.
- To learn more about text processing with awk, see Awk command Unix/Linux with examples
And it's done, you can now use rcodesign ! All that's left is to launch a new build to export your project. To do this, you can use Codemagic's interface, or events affecting your repository such as push.
- See Build Automatically to automate the execution of your Codemagic configuration.
- See also Build Notifications to get a notification informing you of the result of your build.
You can now Download the configuration file to export your macOS project with rcodesign configured on a Codemagic build machine.
Configure notarization
Since notarization requires rcodesign to be configured, be sure to follow the Configure rcodesign step before proceeding.
To use Notarization on the build machine, make sure to enable Notarisation in Godot with your local machine.
You don't need to fullfill the required informations because they won't be saved in your export_presets.cfg file. Instead, these informations will be saved to export_credentials which should never be commited for security reasons.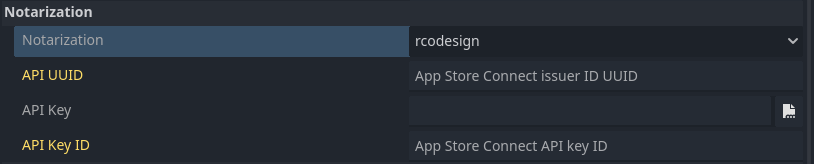
- To learn more about notarization in Godot, see Notarization Options
We will use the following variable groups and variables to retrieve your notarization informations.
- See Godot macOS Environment variables and EditorExportPlatformMacOS to learn more about some of these variables.
| Variable name | Variable value | Group |
|---|---|---|
| NOTARIZATION_API_KEY_NAME | The name(plus extension) of your Apple App Store Connect API issuer key file | apple_credentials |
| GODOT_MACOS_NOTARIZATION_API_KEY | Apple App Store Connect API issuer key file.base64-encoded. | apple_credentials |
| GODOT_MACOS_NOTARIZATION_API_UUID | Apple App Store Connect API issuer UUID. | apple_credentials |
| GODOT_MACOS_NOTARIZATION_API_KEY_ID | Apple App Store Connect API issuer key ID. | apple_credentials |
| GODOT_MACOS_NOTARIZATION_APPLE_ID_NAME | Apple ID account name (email address). | apple_credentials |
| GODOT_MACOS_NOTARIZATION_APPLE_ID_PASSWORD | Apple ID app-specific password. | apple_credentials |
Add these variables in the Codemagic interface (either as Application or as Team variables), make sure to click Secure to make sensitive data encrypted.
- Learn how to store these variables using the Codemagic interface by watching this video:
- To learn more about environment variables in a
codemagic.yamlfile see Configuring Environment Variables - To learn more about storing binary files with Codemagic, see Storing Binary files
- If you don't own a PC, you can use a website like base64.guru or base64encode to encode your
keystorefile to base64.
Now we have to configure Godot environment variables in order to use your informations. Add the following code to your Export Configuration section:
export API_FILE_PATH=/tmp/$NOTARIZATION_API_KEY_NAME
echo $GODOT_MACOS_NOTARIZATION_API_KEY | base64 --decode > $API_FILE_PATH
echo "GODOT_MACOS_NOTARIZATION_API_KEY=$API_FILE_PATH" >> $CM_ENV
Then, make sure your workflow now looks like this:
scripts:
  ...
  - *install_godot_export_templates ...
  - name: Export Configuration
    ...
    EOF
    export API_FILE_PATH=/tmp/$NOTARIZATION_API_KEY_NAME
    ...
  - *export_project ...
What have we done?
- First, we define a variable (
API_FILE_PATH) to specify the path where your encoded Apple App Store Connect API issuer key file will be stored on the build machine. Then, we decode your encoded file and save it to that location. - Next, we update the variable holding the encoded file to point to the decoded file's path, since Godot expects a file path rather than raw encoded data.
- Finally, we register the variable now holding the decoded file path as global environment variables on the build machine, so Godot can access and use it during the build.
And it's done ! You can now uses Notarization with your build ! Now all we need to do is to export the project. To do this, you can use Codemagic's interface, or events affecting your repository such as push.
- See Build Automatically to automate the execution of your Codemagic configuration.
- See also Build Notifications to get a notification informing you of the result of your build.
You can now Download the configuration file to export your Godot macOS project using notarization on a Codemagic build machine.
Overview
Summary of what we've covered on this page using a Codemagic build machine:
- Exported a Godot project to MacOS
- Exported a Godot project to MacOS with rcodesign
- Exported a Godot project to MacOS with notarization
Download table
| File | Content | Tutorials |
|---|---|---|
| Download | Unsigned macOS export with your build. | Jump to tutorial |
| Download | rcodesign Configuration for Godot macOS Export | Jump to tutorial |
| Download | Notarization Configuration for Godot macOS Export | Jump to tutorial |
Caution !!!
To use these scripts effectively, please refer to the corresponding tutorials.
The scripts on this site are general and will fit most use cases. However, specific adjustments to your project may be necessary.
Please note that some scripts depend on environment variables which must be set via the Codemagic interface. Without them, some scripts will not work.
Optional resources to help refine your configuration:
Getting help and support
If you have a technical question or need help with some particular issue, you can get help in the GitHub Discussions community.